STEP 1
Connect to your VDS with SSH. You can use terminal on MacOS or Linux, or Putty in Windows.
STEP 2
Here is the way to install WireGuard on Ubuntu or Debian. Before installing any software, it is always a good idea to update your system. Use the following command to update your system.
apt update && apt upgradeSTEP 3
Next is installation of Docker.
curl -sSL https://get.docker.com | shSTEP 4
Now let’s generate a password hash. To do that we’ll need to enter the following command:
docker run -it ghcr.io/wg-easy/wg-easy wgpw YOUR_PASSWORDThe output you’ll get will look like this:
PASSWORD_HASH='$2b$12$coPqCsPtcFO.Ab99xylBNOW4.Iu7OOA2/ZIboHN6/oyxca3MWo7fW' STEP 5
The following command will install WireGuard. On the place of yourIP insert an IP address of your server. Also change yourHash to the password hash of a password that you will use to access the control pannel of WireGuard.
docker run -d --name=wg-easy -e WG_HOST="yourIP" -e PASSWORD_HASH="yourHash" -v ~/.wg-easy:/etc/wireguard -p 51820:51820/udp -p 51821:51821/tcp --cap-add=NET_ADMIN --cap-add=SYS_MODULE --sysctl="net.ipv4.conf.all.src_valid_mark=1" --sysctl="net.ipv4.ip_forward=1" --restart unless-stopped weejewel/wg-easySTEP 6
Open your browser and insert “yourIP:51821”. For example – 000.000.000.000:51821 .
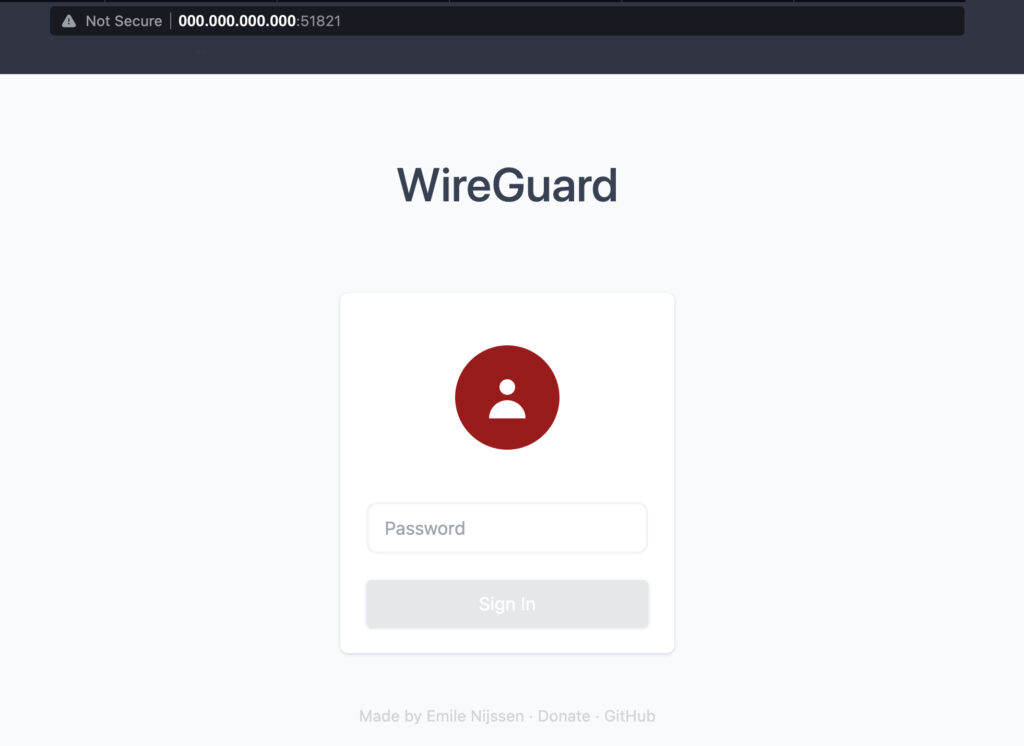
STEP 7
Enter your password to get into web panel.
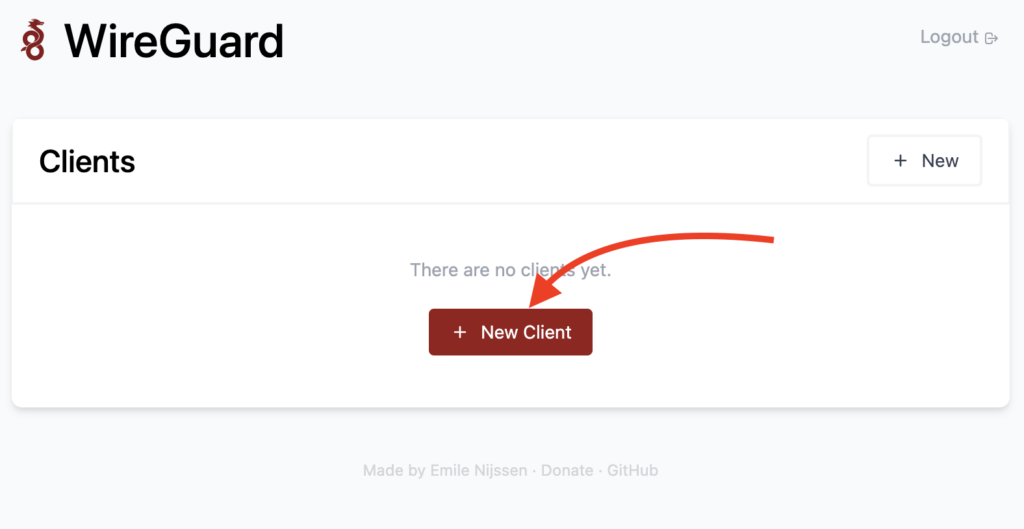
STEP 8
Click the button “New Client” and enter a name.
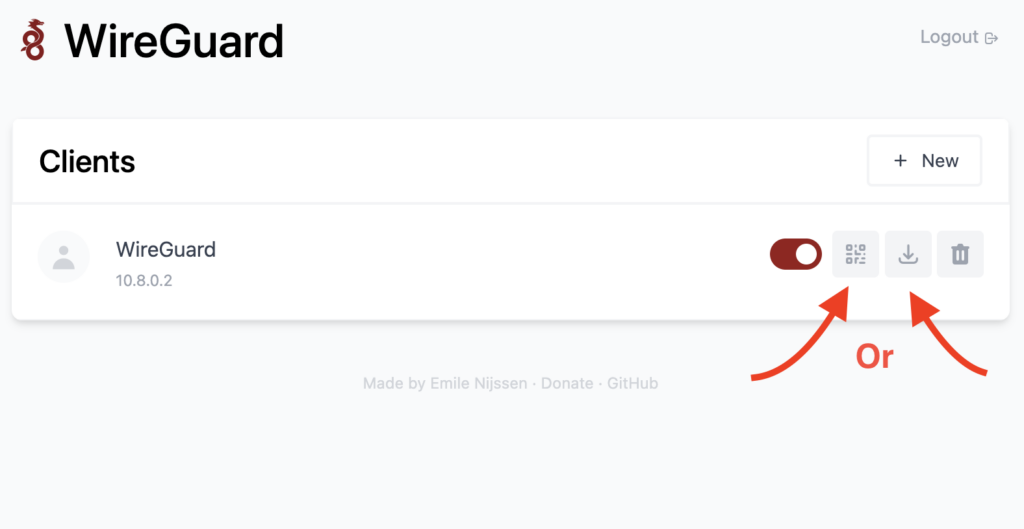
STEP 9
To connect your dvice click and scan QR code with wireGuard app or download a .config file and insert into your WireGuard client. Please note that you should use official WireGuard client to connect to your server.
P.s If you want to learn more about installation and cofiguration, you can check https://github.com/wg-easy/wg-easy. You can also check the official WireGuard documentation.


