Back-upping your data always is a great thing to do, however, not everyone knows how to do the back-ups or how to automate this process. Purpose of this article is to show you how to install Veeam and how to set up a simple back-upping solution.
Installation #
In this case, we will show the installation process on CentOS and Ubuntu.
STEP 1. Go to https://www.veeam.com/linux-backup-download.html and Sign in.
STEP 2. After that choose your operating system and architecture. And click “Get Link”.
STEP 3. Next to “Repository package for CentOS/RHEL/Oracle Linux 7 (Or Debian/Ubuntu)” click the “Download” button.
STEP 4. Copy this file to a remote server, that you want to backup.
STEP 5. Connect to your remote server.
CentOS #
STEP 1. Go to a directory with “.rpm” file.
STEP 2. Execute the following command:
rpm -ivh ./veeam-release* && yum check-updateSTEP 3. Use the command:
yum install kmod-veeamsnap veeamSTEP 4. Then install nfs-utils:
yum install nfs-utilsUbuntu/Debian #
STEP 1. Go to a directory with “.deb” file.
STEP 2. Execute the following command:
dpkg -i ./veeam-release* && apt-get updateSTEP 3. Use the command:
apt-get install veeamSTEP 4. Then install nfs-utils:
apt-get install nfs-commonInstalation on back-up server #
On the backup server, you will need to install nfs and configure it.
STEP 1. Install nfs module
CentOS
yum install nfs-utilsUbuntu/Debian
apt-get install nfs-commonSTEP 2. Make a Backup folder
mkdir /var/backupFolderSTEP 3. Give required permissions with this command.
chmod -R 755 /var/nfs_share_dirSTEP 4. Start nfs services using the following commands.
systemctl enable rpcbind
systemctl enable nfs-server
systemctl enable nfs-lock
systemctl enable nfs-idmap
systemctl start rpcbind
systemctl start nfs-server
systemctl start nfs-lock
systemctl start nfs-idmap
STEP 5. Using your text editor, open the /etc/exports file and add the following line:
/var/nfs_share_dir x.x.x.x(rw,sync,no_root_squash)NOTE: On the “x.x.x.x” you should enter IP of the server that you want to backup.
STEP 6. Restart nfs-server
systemctl restart nfs-serverSTEP 7. If you are using CentOS 7 – execute the following commands:
firewall-cmd --permanent --zone=public --add-service=nfs
firewall-cmd --permanent --zone=public --add-service=mountd
firewall-cmd --permanent --zone=public --add-service=rpc-bind
firewall-cmd --reload
Set-upping Veeam #
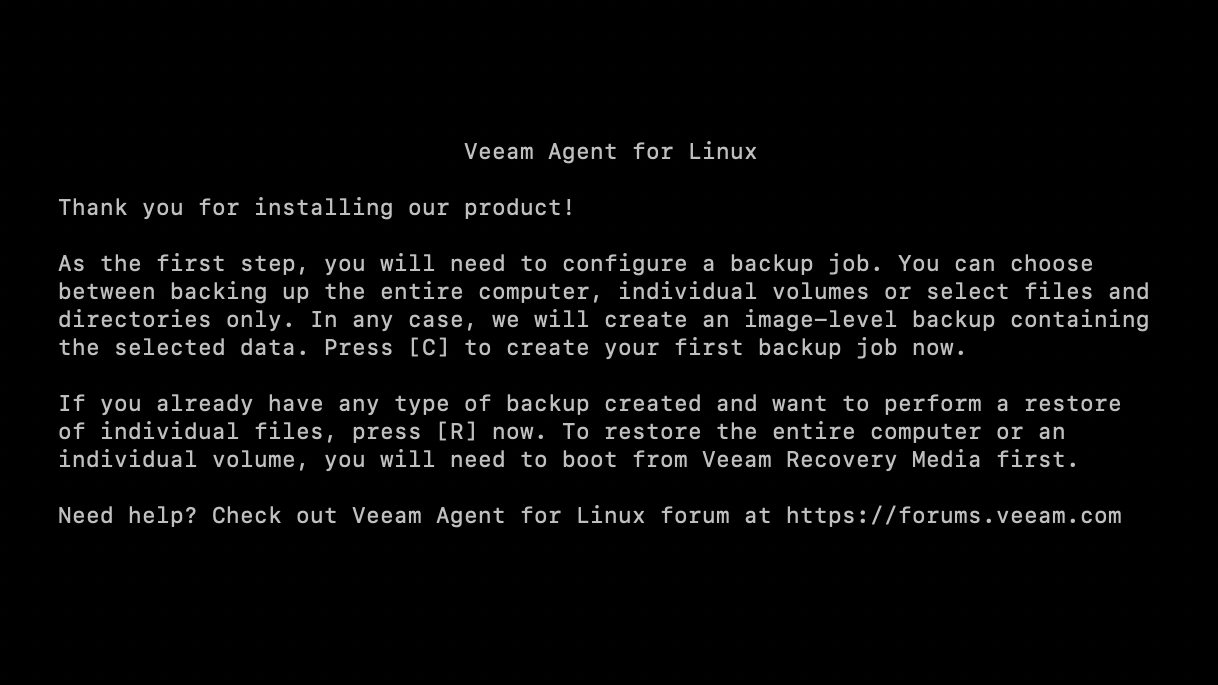
STEP 1. On the server that you want to backup, run the following command:
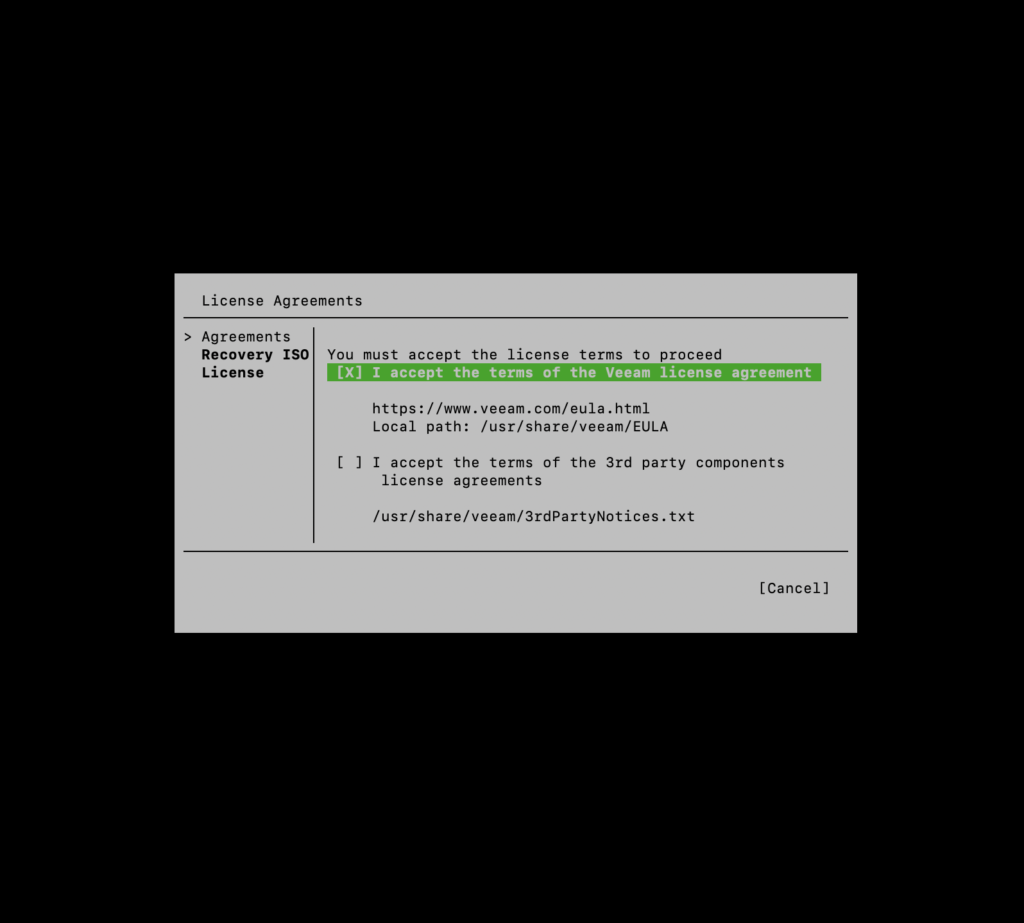
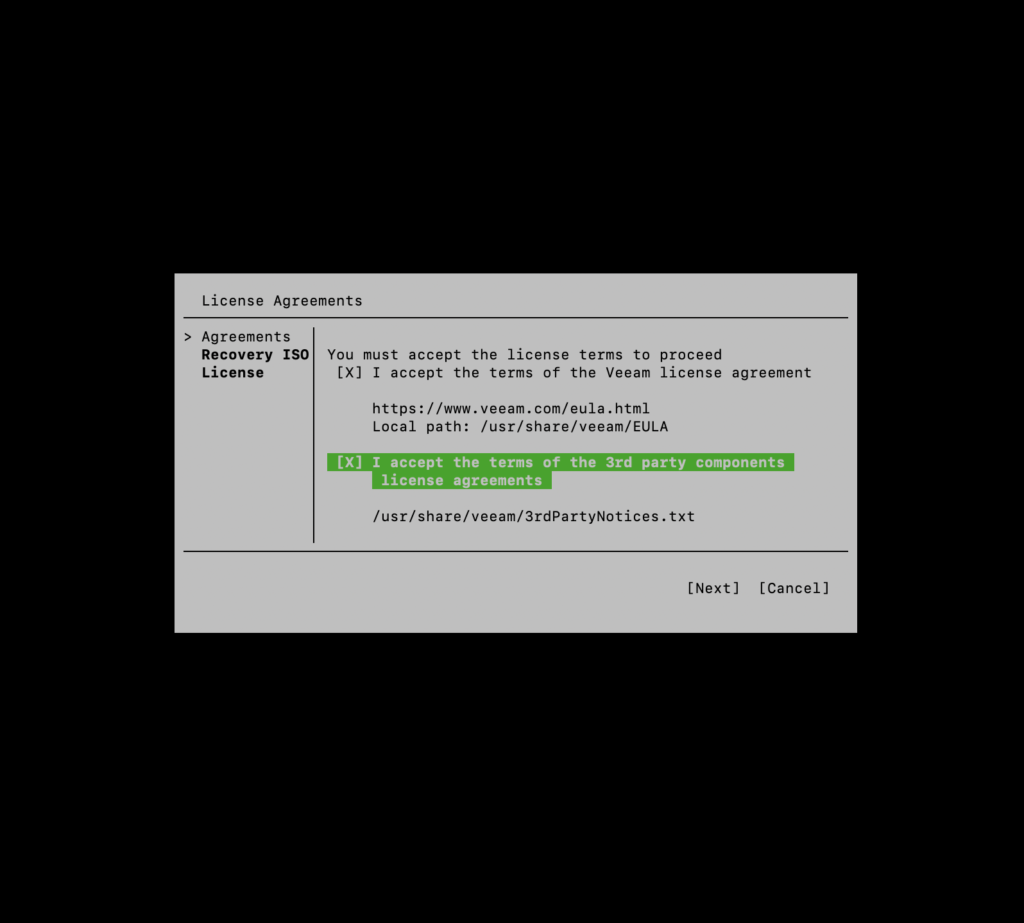
veeamSTEP 2. To use veeam you will need to accept the license terms. To accept them, you need to press “Space“. After that press “↓” and press “Space” again. Then press “Enter“
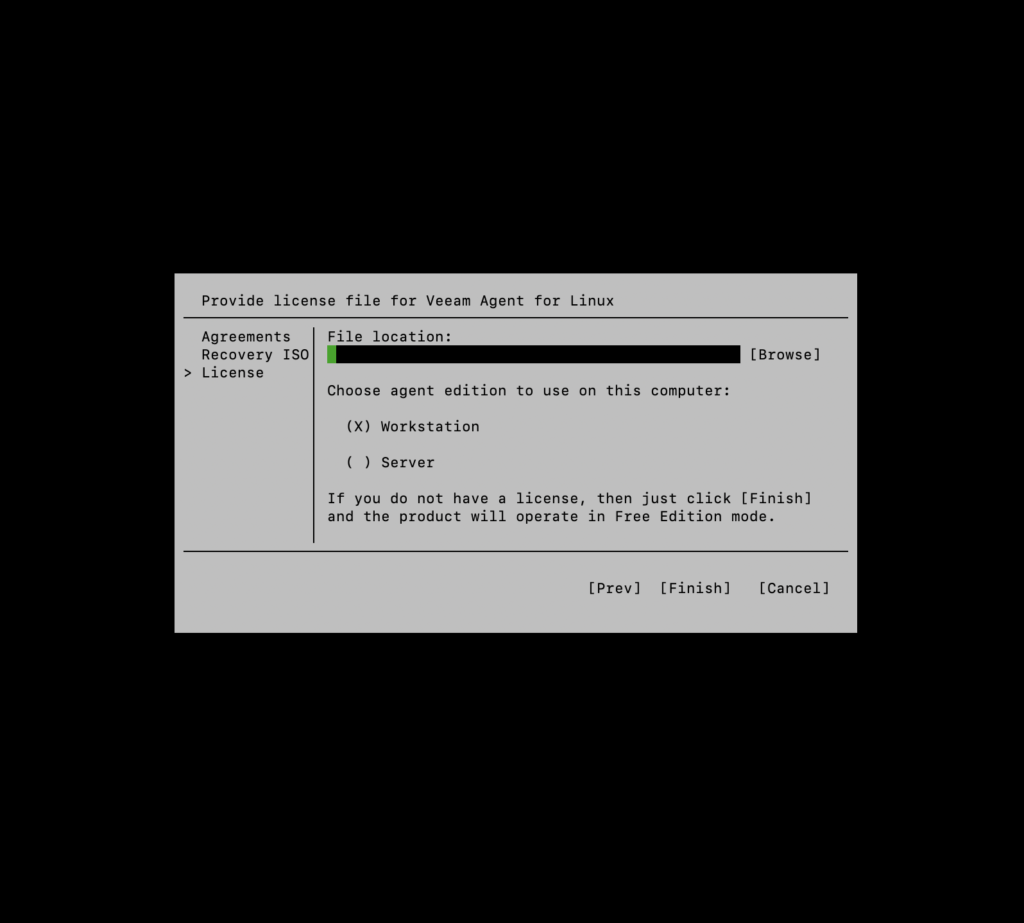
STEP 3. Check if “Workstation” is selected. If yes – press “Enter“. If not, press “Tab” and select “Workstation“. For navigation, you can use arrows.
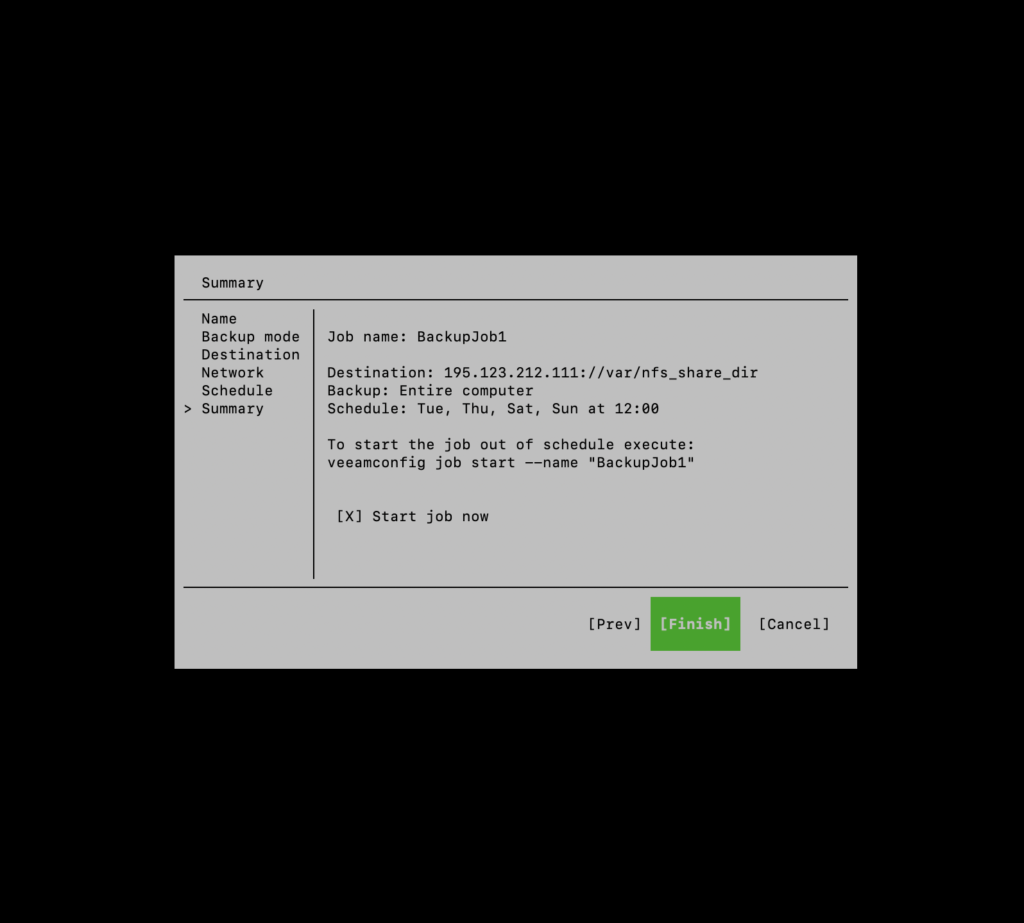
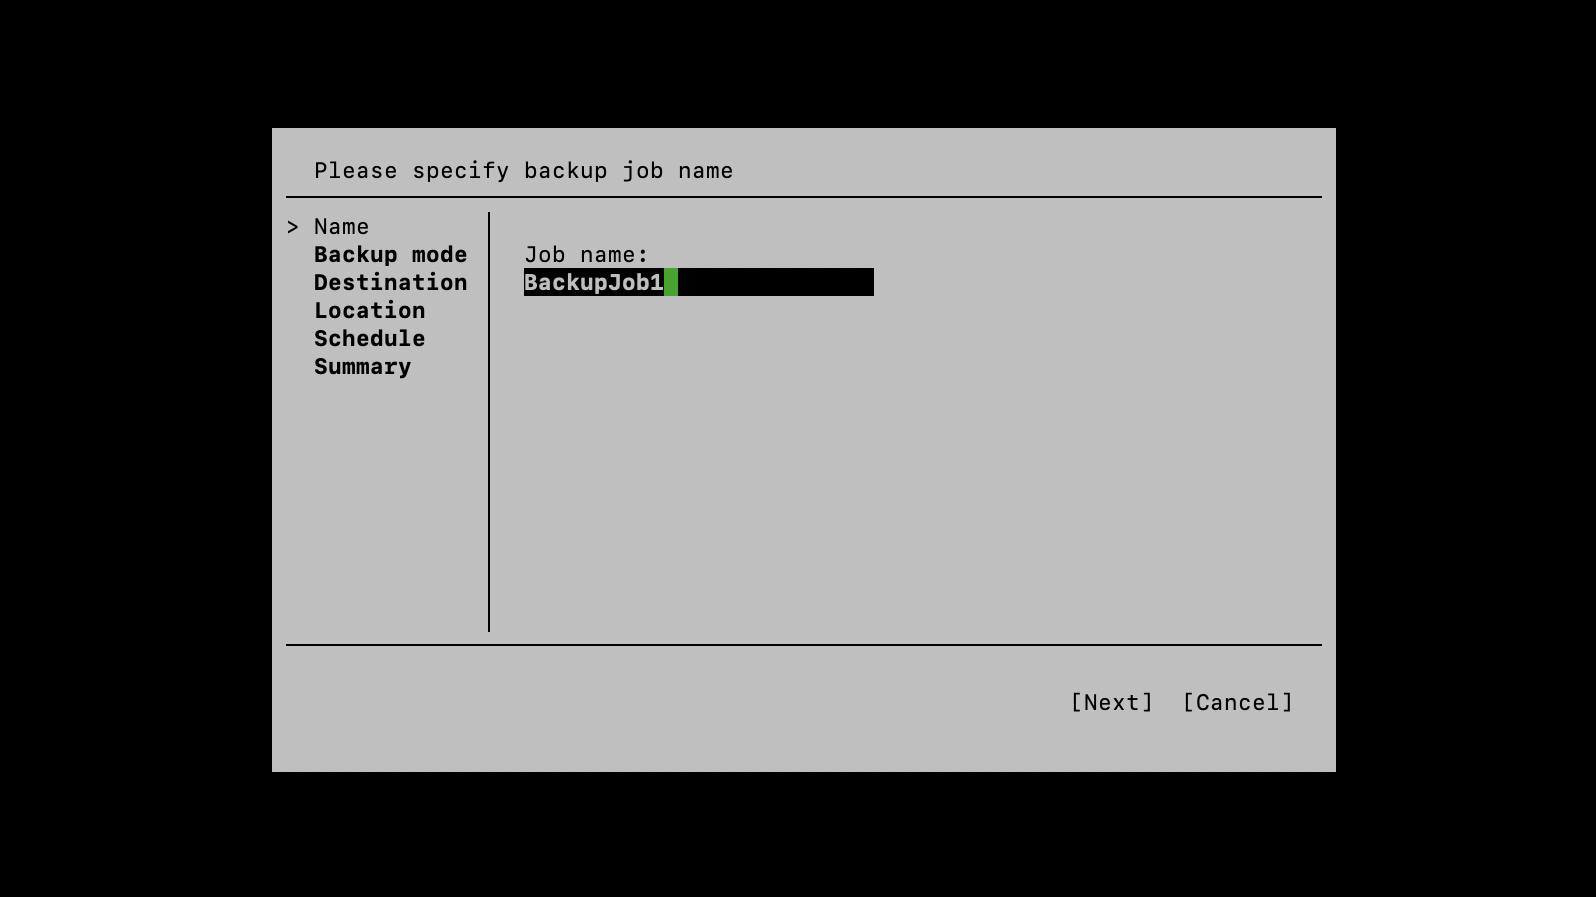
STEP 4. Press “C“. Type a backup job name. You can leave default one.
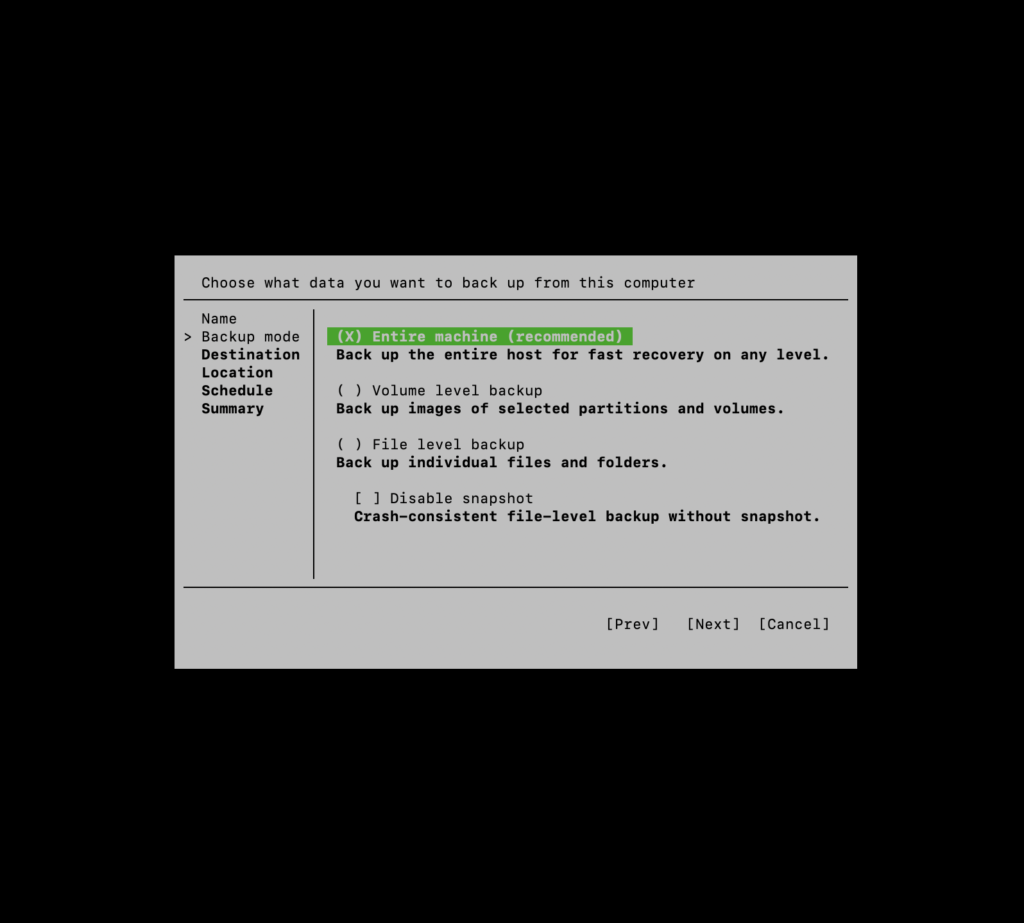
STEP 5. Select backup mode. It is recommended to backup the entire machine, however you can choose other options. To continue press “Enter“.
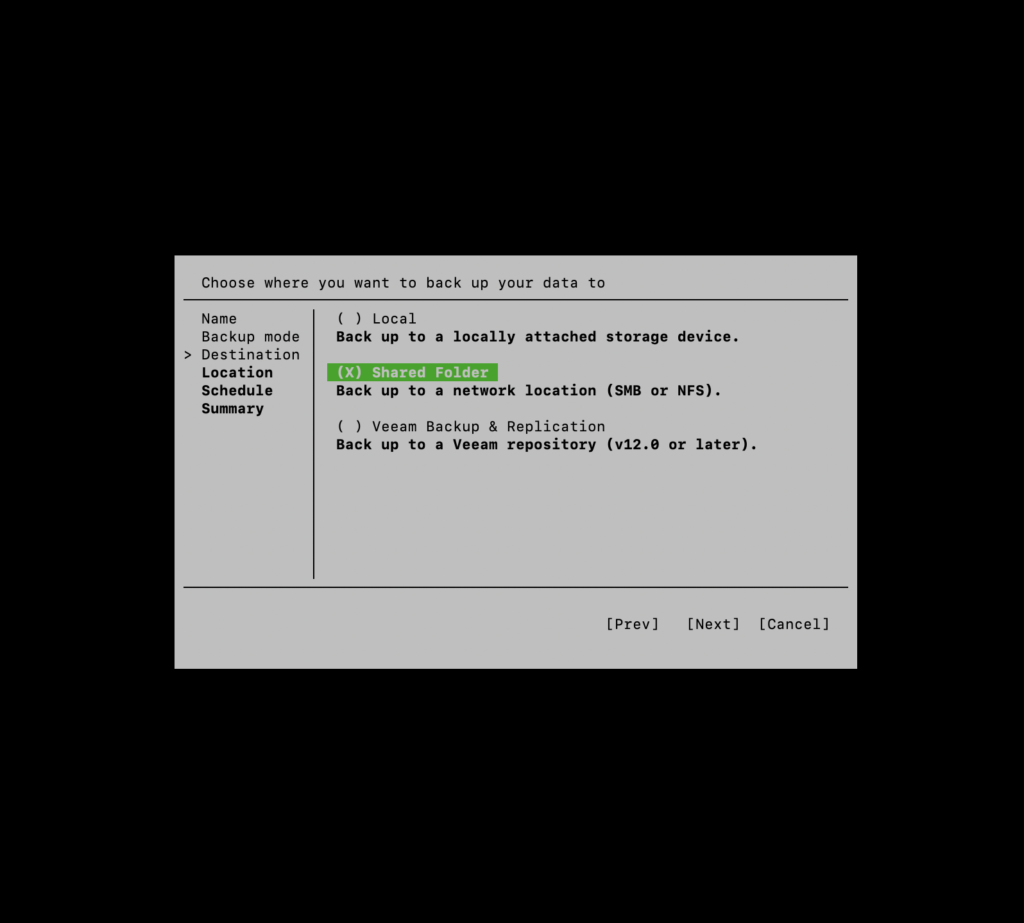
STEP 6. As destination select shared folder.
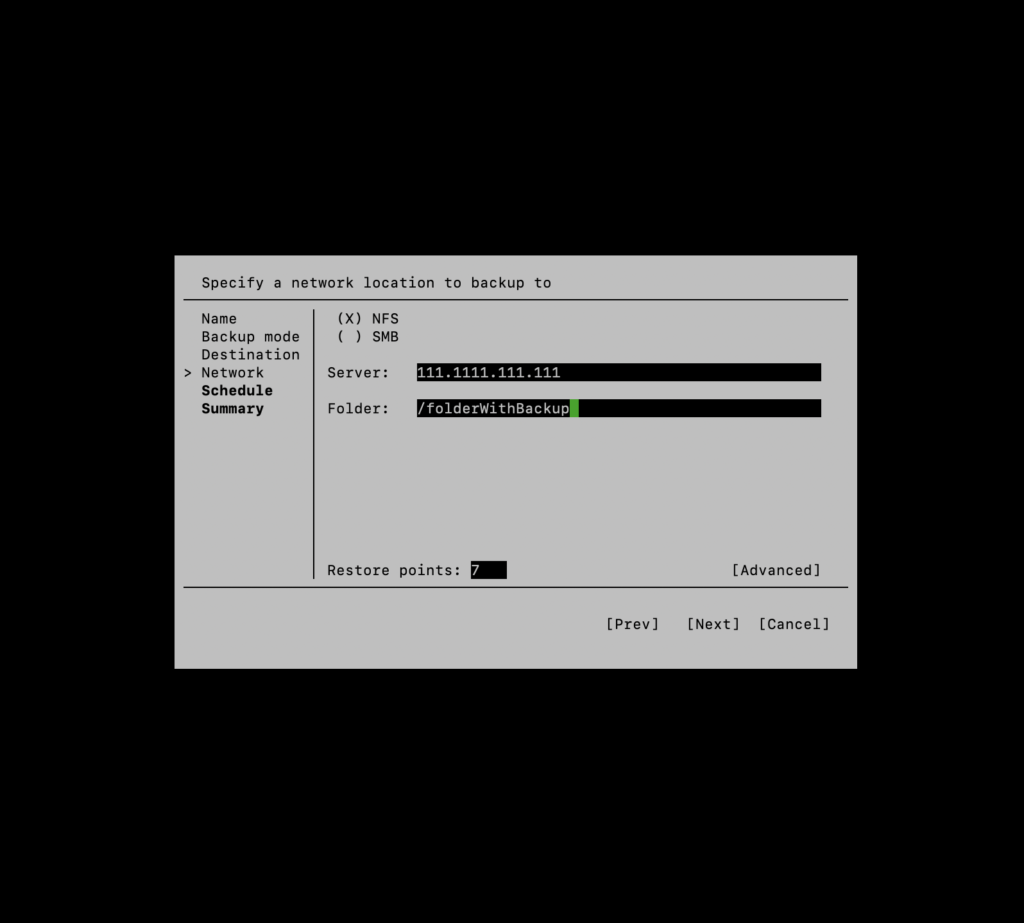
STEP 7. Select NFS and press “Tab“.
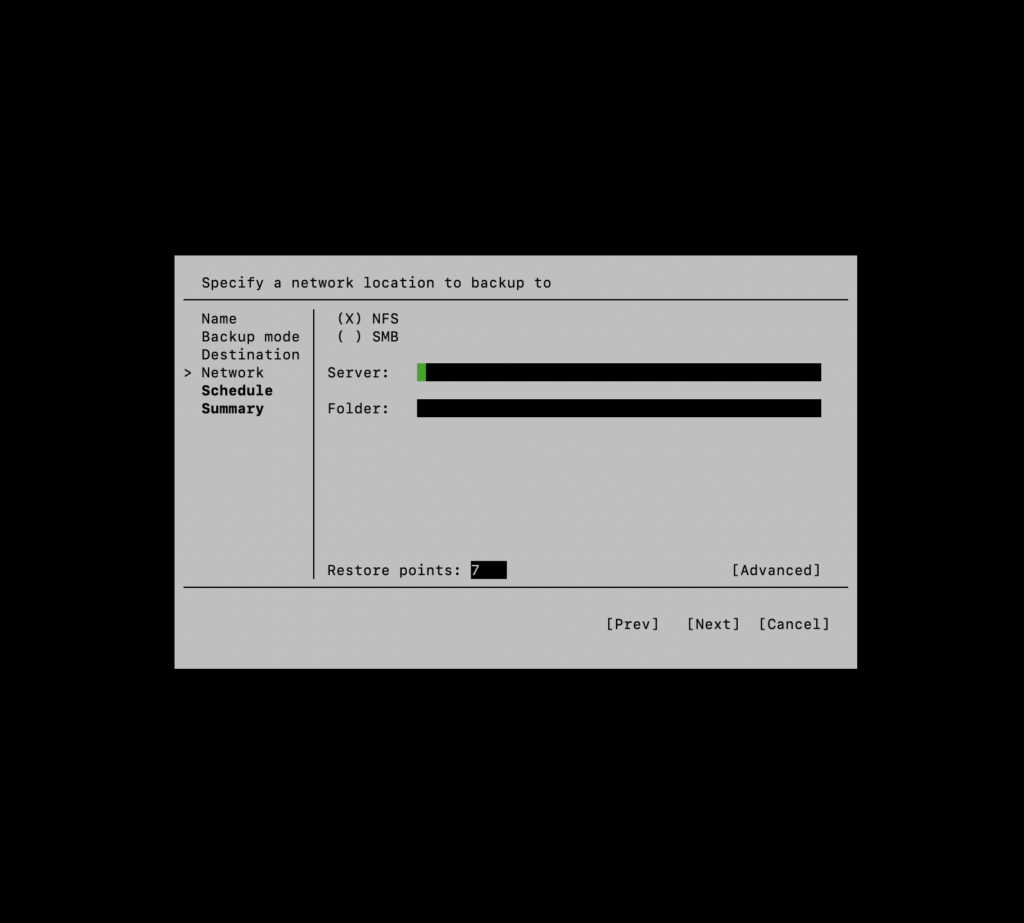
STEP 8. Enter the IP address of the backup server. Press “Tab” and enter the destination folder. Press “Enter” and wait.
STEP 9. Check is “Run the job automatically” is activated, if not – activate it with “Space“.
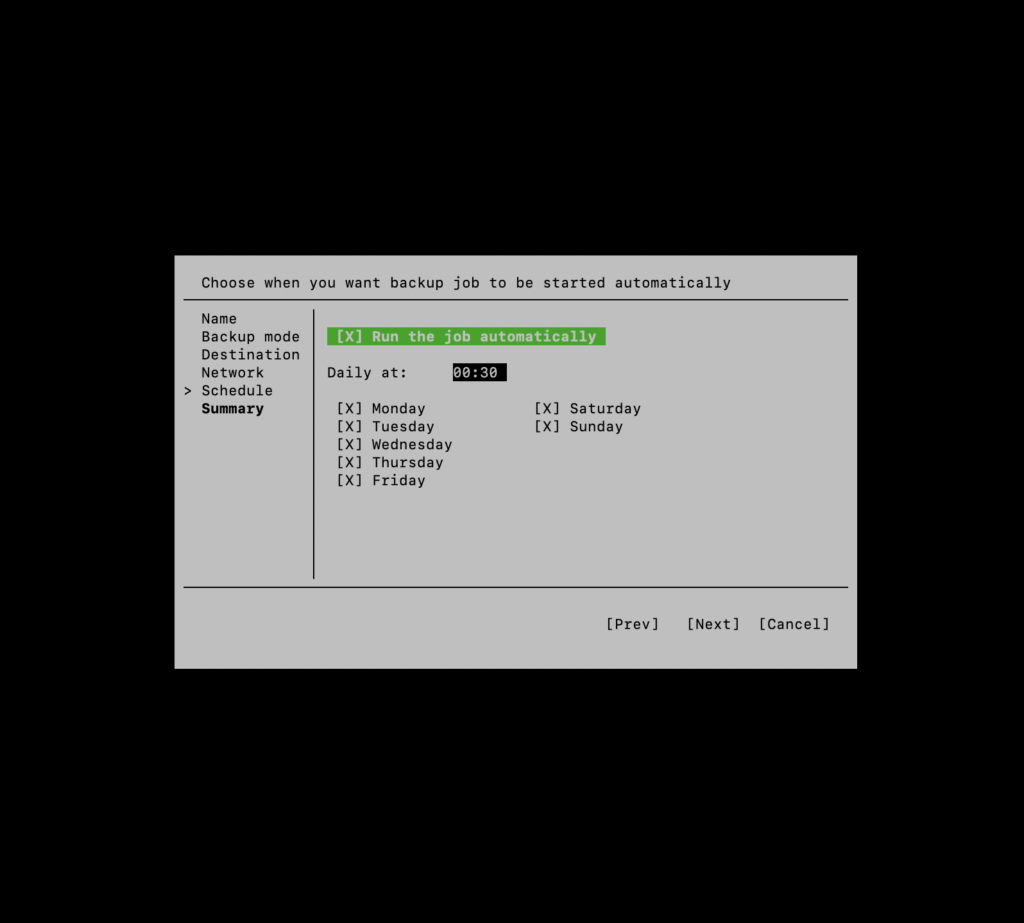
STEP 10. To edit the time, when back-upping is going to start, press “Tab“. With arrows “←” and “→” you can select hours and minutes.
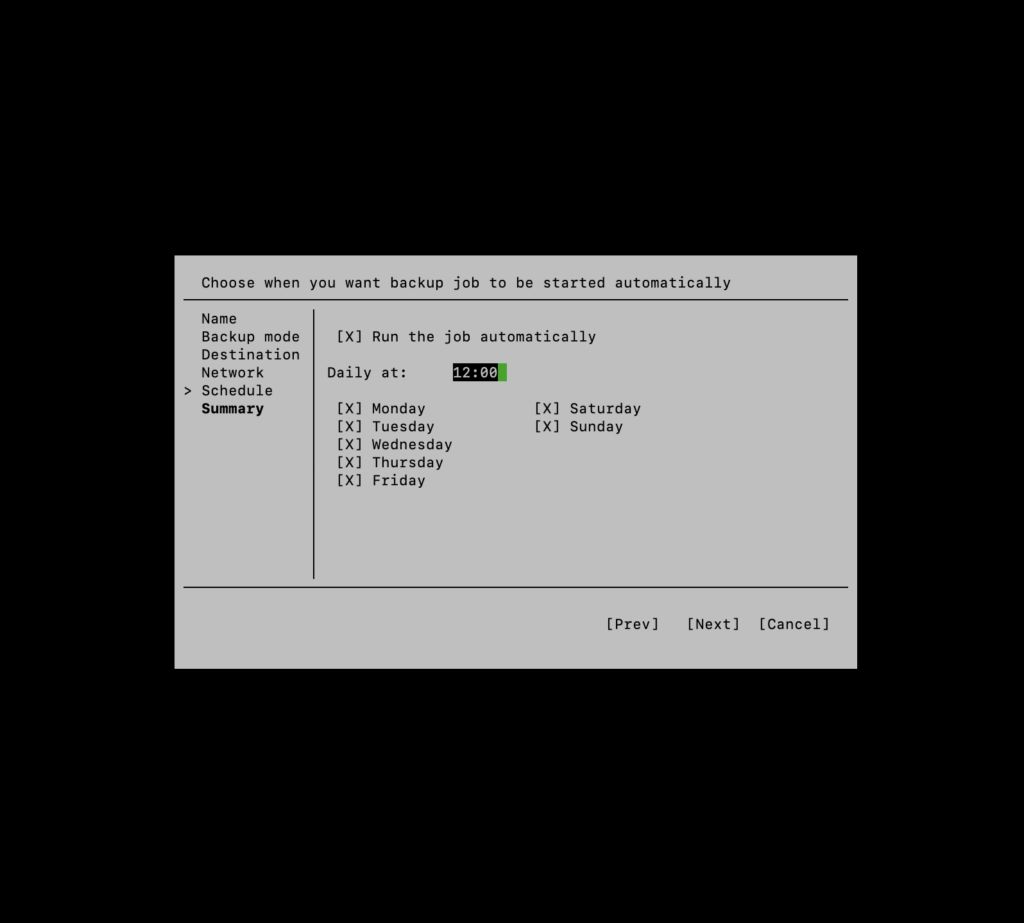
STEP 11. To edit the days – press “Tab“, and using Up and Down arrows navigate to the days you want to change. As always, you are selecting the day by pressing “Space“.
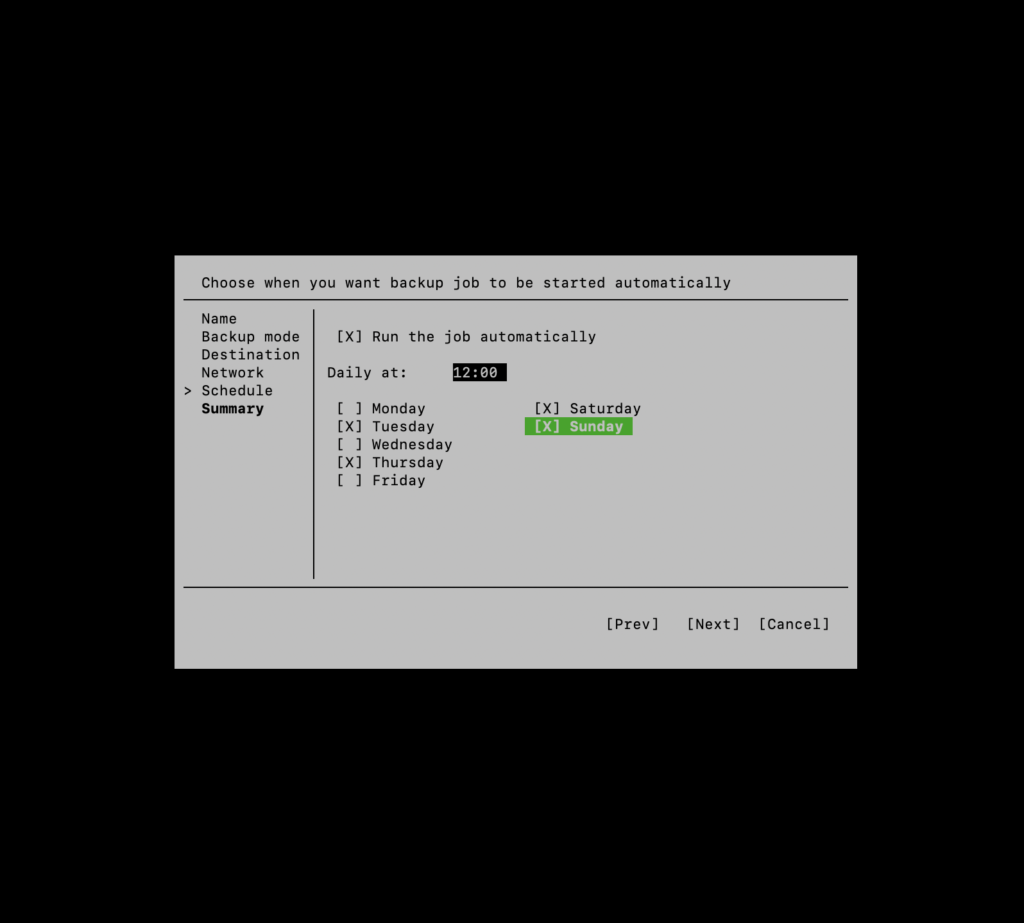
STEP 12. Hit the “Enter“. If you want to backup now – select “Start the job“. Otherwise, back-upping will start according to the schedule.
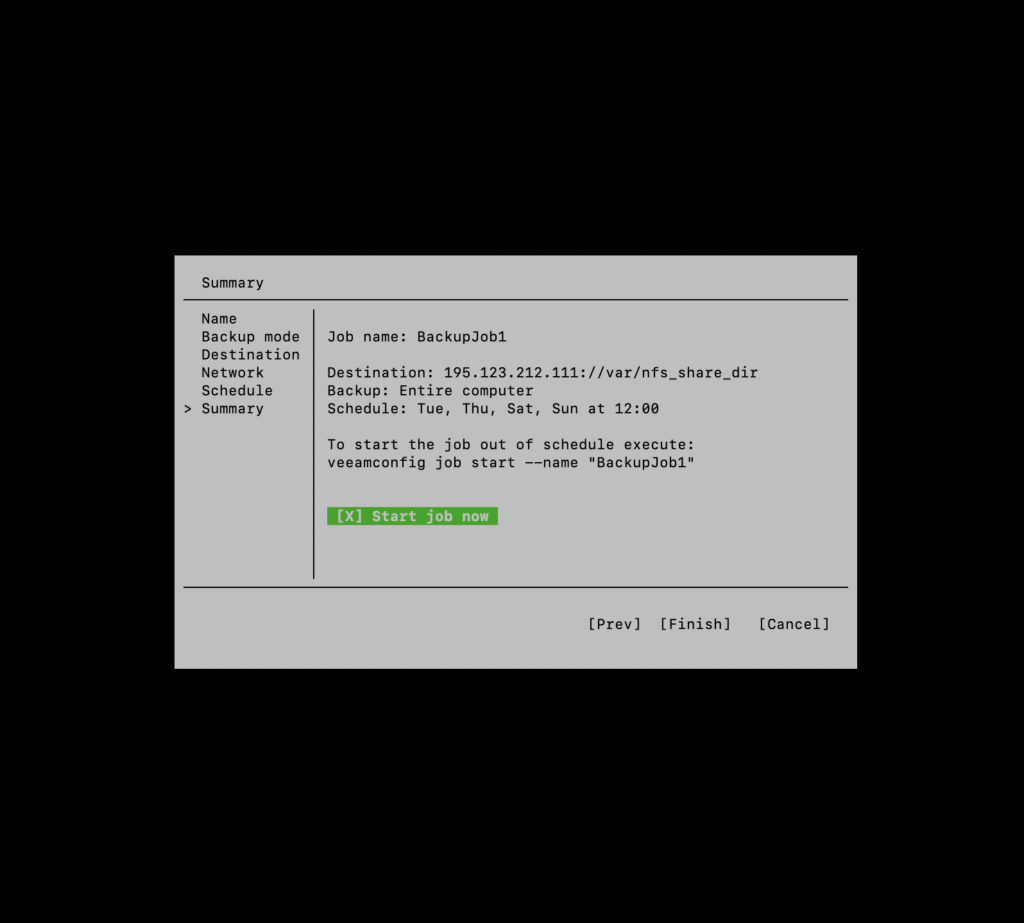
STEP 13. Press “Enter” to finish.